
If you’ve ever used AirDrop in a crowded place, you know how frustrating it can be with all the devices that appear. Read along to find out how to make your device’s name unique so that you can find it easily in the AirDrop menu.
How to Change the AirDrop Name of Your iPhone or iPad
Using AirDrop to share photos from your iPhone is one of the easiest ways to share content with friends and family. To find the right device in the AirDrop menu among a sea of Apple devices, you can change the name of your iPhone or iPad by following these steps.
Go to Settings > General > About > Name. Then, tap the X icon next to the current name of the device. Next, type the new name you want to assign to your iPhone or iPad and tap Done to save your changes.
How to Change the AirDrop Name of Your Mac
If you own a Mac, it’s just as easy to change its AirDrop name. The new name will show up when AirDropping a file from an iPhone to a Mac. Here’s what you need to do in macOS:
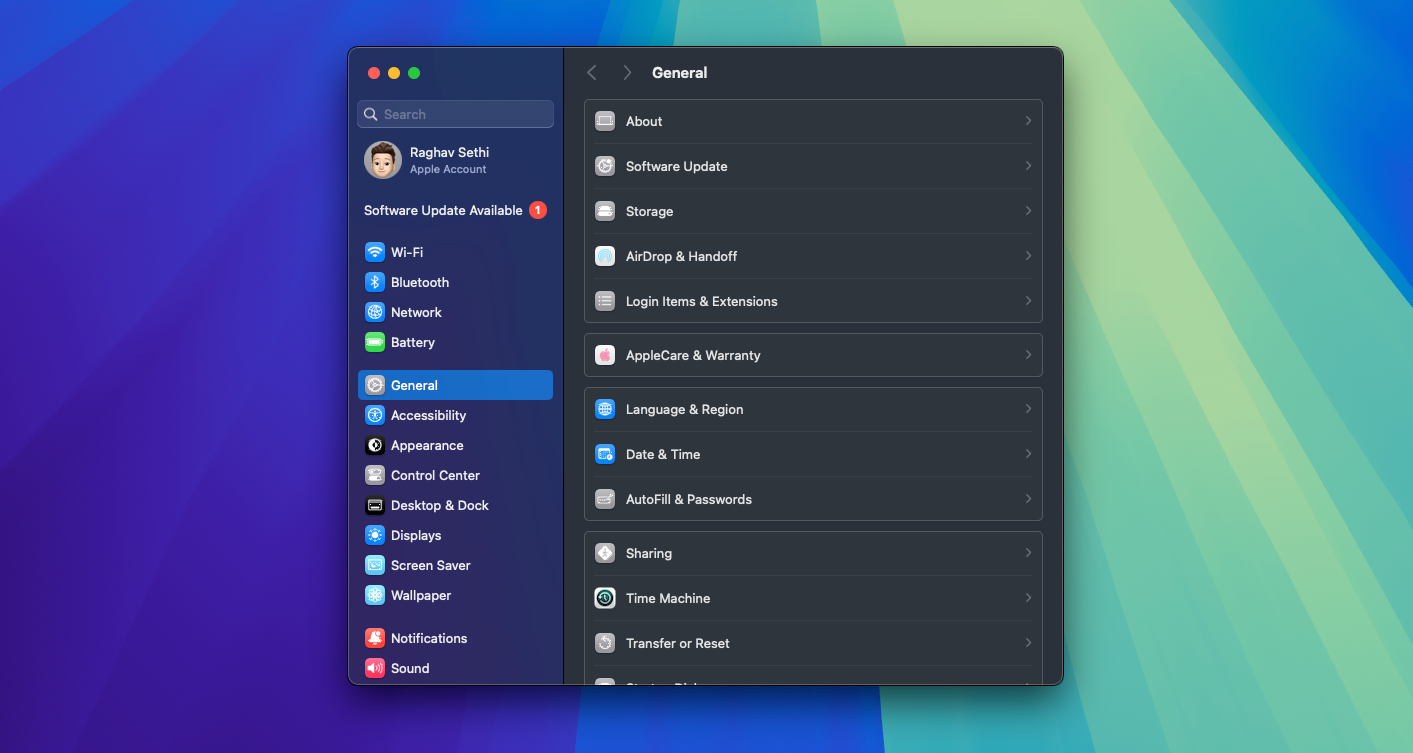
- Click the Apple logo in the menu bar and select System Settings from the dropdown. You can also open System Settings via Spotlight Search.
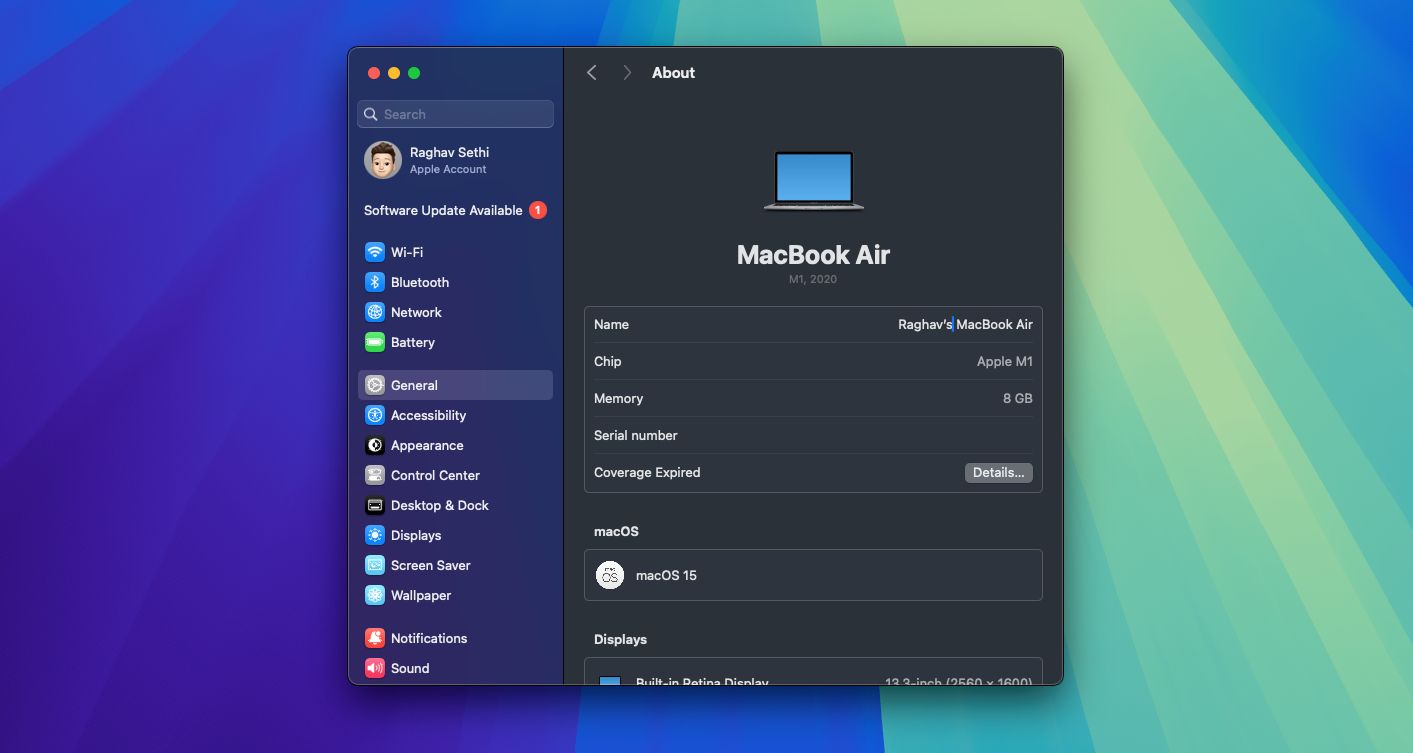
- Click General from the left sidebar, then select the About option on the right.
- Just click on the name of your Mac and type in the new name that you want to show up in the AirDrop menu.


When you change your Mac’s name, its local network address will also change. So, if you have apps or devices that use this address, you may need to reconfigure some settings.
When it comes to sending files from one Apple device to another, AirDrop takes the cake for being one of the easiest ways to do it. By giving your iPhone, iPad, or Mac a unique name, you can make the process of sending photos, videos, or documents even faster and safer for everyone.